How to Install
FloodSaver® Pans
Use a hole saw for cutting holes in the unit! Do Not Use Multi-spur or forstner bits! If possible, turn hole saw backward, or counter-clockwise.
The subfloor supports the pan and appliance and therefore must be in serviceable condition. All work must follow local building codes.
For washing machine applications, the hot and cold valves must clear top of washing machine unless sillcocks are used and installed tight against panel!

- STEP 1
Determine the location of the pan on the subfloor, then slide it tightly against the wall plate. This will determine the location on the subfloor for the base drain. - STEP 2
Cut a hole in the subfloor just large enough to allow installation of a shower drain after the base has been attached to the floor. Adjust the flanges in or out to obtain a straight edge, then install fasteners. - STEP 3
Underlayment must not be forced against the sides of the pan, but can be touching. - STEP 4
COVER FOR THE REMAINDER OF THE BUILDING PROCESS AND PROTECT WHEN INSTALLING THE WASHING MACHINE. The rubber pads must be installed on the washing machine feet. This unit is very tough, but will scratch. - STEP 5
Adjust the legs of the machine evenly. - STEP 6
Clean with a soft detergent or soap and water. Never use abrasive cleaners.
PLEASE MEASURE CARFULLY!
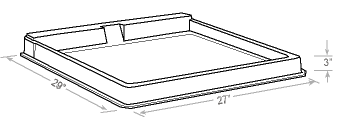
Measure your appliance 3" from the floor for the inside dimension. Measure the room space available for outside dimension to determine the correct pan size.
Warranty Information and How to Order