How to Install
FloodSaver® Surrounds
Part 1: Plumbing
FloodSaver® offers some alternatives for plumbing the water supply hookup and the washer outflow.
Plumbing the water supply and washer outflow:
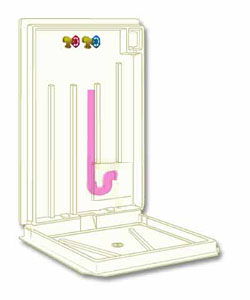
The unit can be plumbed with standard hose bibs and outflow, or with a standard plumber's box, as shown below.Plumber's Box example
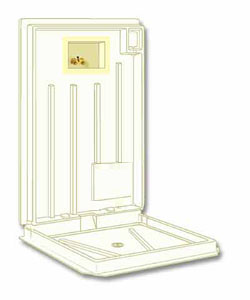
Hose bibs and outflow example
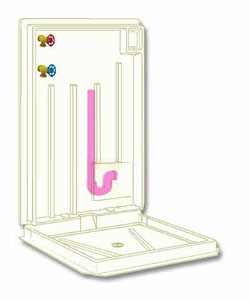
Note for stackable washer/dryer installations:
For easier access to the hose bibs, position the hose bibs vertically, one on top of the other, on the far left-hand side of the area outlined.
Plumber's Box vertical stack example
Hot and cold valves must clear top of washing machine unless sillcocks are used and installed tight against panel! Use a hole saw for cutting holes in the unit! Do Not Use Multi-spur or forstner bits!
Part 2: Installation
Before installation begins – check wall studs and bottom wall plate for proper alignment and wall plumb. The subfloor supports the floor base and washing machine and therefore must be in serviceable condition. All work must follow local building codes.
Step 1
Determine the location of the floor base on the subfloor, then slide it tightly against the wall plate. This will determine the location on the subfloor for the base drain and assure that the wall panel will fit properly on the base.Step 2
Cut a hole in the subfloor just large enough to allow installation of a shower drain after the base has been attached to the floor. Adjust the flanges in or out to obtain a straight edge, then fasten with a minimum number of fasteners.Step 3
Position the wall panel on the base and mark the position of the flanges for wall backing and fire blocking. Install backing. Adjust flanges in or out to obtain a straight surface for wall board, then fasten flanges to backing AFTER THE HOLES FOR WATER SUPPLY AND WASTE PIPE HAVE BEEN DRILLED! CAUTION! Plumbing may require that this sequence be modified to satisfy individual installations.Step 4
Locate hot and cold valves so that they will clear the top of the washing machine unless sillcocks are used and installed tight against the wall panel! CUT HOLES CAREFULLY WITH HOLE SAW! IMPORTANT: Apply silicone sealant at the junction of the waste pipe and drilled hole.
If a PLUMBER'S BOX is used:
Locate the area to be removed in the wall panel. Cut with a very fine tooth saw or knife. Install wall panel and trim for plumber's box.Step 5
Underlayment and wallboard must not be forced against the sides of the floor base or wall panel, but can be touching.Step 6
COVER FOR THE REMAINDER OF THE BUILDING PROCESS AND PROTECT WHEN INSTALLING THE WASHING MACHINE. The rubber pads must be installed on the washing machine feet. This unit is very tough, but will scratch.Step 7
Extend legs of the machine evenly.Step 8
Clean with a soft detergent or soap and water. Never use abrasive cleaners.
PLEASE MEASURE CARFULLY!
Measure your appliance 3" from the floor for the inside dimension. Measure the room space available for outside dimension to determine the correct pan size.
Warranty Information and How to Order
Made in the USA
Phone Orders: (8:30 AM - 4:30 PM Pacific Time)
1-800-929-9269 or 360-629-9269
FAX Orders: 360-629-2838 Order Form
(123K PDF)
(463K PDF)